


The Problem
Trainers struggle to incorporate group work effectively, even when it is the more effective, streamlined training option.
The Solution
An training video and integrated worksheet that walks facilitators through designing structured, goal-oriented group learning, allowing novice project managers to explore these possible mistakes, and understand how to avoid them.
DESIGN
Drafting the Content
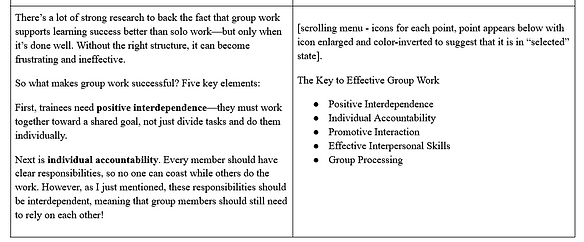
I began this project by outlining the content, drawing both from my own experience conducting workshops as well as several sources, including various university faculty development websites and the Cult of Pedagogy blog. I structured the video into a logical sequence: [1] The benefits of group work and the purposes it serves; [2] Common challenges and how to address them; [3] Purposeful design strategies, including how to generate effective learning outcomes through backward design; and [4] Structured group activities, using a stacking method to combine different types of group work.
Once the outline was complete, I moved to Google Docs and created a two-column table—placing my script on the left side and planned slides on the right to ensure alignment between narration and visuals.
Incorporating an Active Learning Component
To ensure this wasn’t just another passive video presentation—and to maximize engagement while providing a concrete takeaway—I designed a worksheet for learners to complete at designated points throughout the video. These interactive moments were intentionally placed after important concepts to encourage immediate application of the material.
This approach does more than just reinforce learning—it models a design process that trainees can later replicate on their own. By the end of the video, learners don’t just walk away with theoretical knowledge; they have a fully developed group-work plan and a clear next step: implementation. To further support this, I included a rubric that allows learners to evaluate and refine their final product, ensuring quality and effectiveness.


DEVELOPMENT
Visuals
After finalizing the design stage, I moved into development, which included three main steps. The first was creating slides in PowerPoint. I chose clean, modern background visuals with tall buildings, glass windows, and city views—subtly reinforcing a sense of professionalism and upward growth. To maintain a sleek and accessible design, I used large Montserrat font in black or white, for better readability and impact.
As a modern alternative to traditional bullet points, I used smooth transitions and PowerPoint’s “morph” effect to create dynamic movement—simulating scrolling effects, highlighting key ideas one at a time, and for a purposeful, polished feel.

Audio
Once the slides were finalized, I recorded a double-track voiceover in Audacity using a Blue Yeti stand microphone. I re-recorded sentences on the same track whenever I stumbled, using a clicker to create an audio marker for every retake. This streamlined the editing process considerably.
I then edited the voiceover in Audacity, removing the bad takes, as well as background noise, long gaps, and any external sounds. For a professional touch, I added a music track from freetouse.com, adjusting its volume and using Audacity’s autoduck feature to cause the music to automatically lower when I spoke and rise to fill silences. I also looped the track, trimming the end so that the beats aligned properly. Finally, I added a fade-out effect for a polished finish.

Syncing
I synced the finalized voiceover with my visuals by manually clicking through my PowerPoint presentation while playing the audio and using the "Rehearse Timings" feature. This allowed me to record the presentation with accurate slide timing that matched the pacing of the narration.
Next, I uploaded the PowerPoint MP4 video track and the Audacity WAV voiceover track to Clipchamp, where I aligned them together and exported the final product as a video in high-definition MP4 format. I then uploaded the video to YouTube and used YouTube’s auto-captioning feature to generate subtitles. I also included a list of my sources in the YouTube video description field.

Worksheet
Finally, on Google Docs, I put together the downloadable handout containing the worksheet, a Bloom’s Taxonomy infographic (to help craft precise learning outcomes), a list of group activity types (for inspiration and variety), and the rubric to evaluate and refine a group activity-oriented workshop plan.

REFLECTIONS
I have previously created instructional videos, especially during the pandemic, but I experimented with a few new techniques for this one. In my previous videos, I built everything directly in video editing software using slide images and voiceover. This time, I chose to incorporate PowerPoint’s transitions, which I find more polished than standard video cuts. I was especially excited to use the "morph" feature, after seeing it many times on Instagram reels (yes, I follow PowerPoint creators).
I think the format has worked well, though it may perhaps work even better for short-form videos that don’t require a worksheet component. Despite my efforts, I still feel that parts of the video are a bit static, likely due to its length. If I were to iterate on this project, I’d look for ways to make the pacing even more engaging throughout. Additionally, while I used a high-quality mic, I’m not completely satisfied with the voiceover audio—it sounds slightly muffled. This may be due to my lack of a proper recording space, but I plan to experiment with mic settings, positioning, and recording environments to optimize this aspect of my process